

)
7 easy steps to setup CloudFlare CDN for better website loading speed
Published by on May 16, 2017 11:16 am12 Aug 2017 12:17:33
Before we understand how to set up Cloudflare CDN let us begin with why CDN is needed?
Even if you have a great looking website, you might not be able to have any visitors or convert them to sales. Why? This is because improving website performance matters.Just put yourself in your visitor’s shoes. Would you visit a website, which doesn’t load at all? Or worse still, you cannot see what’s on the page, because the page is very slow. This is when, you leave the site and move on to a faster site.
So, now that you know why page speed matters, you need to know how to Speed up wordpress site. Does minification, caching, or content delivery network sounds too technical to you? It would if you are a website owner who doesn’t have much technical know – how. However, maintaining your website loading speed, or trying out Web optimization is easy enough. Before we delve into the nitty gritty, let’s look at the CDN details.
What Is CDN?
CDN or Content Delivery Network helps you to deliver your content better. What they do is they cache your content on their various servers across the world. So, when a visitor visits your site, they get delivered the content from a server nearer to them, making it faster to load, compared to your website from your original server. However, you might ask what if the visitors are being delivered stale content. This is why the delivery network is essential because it refreshes the content at frequent intervals making sure that your visitors get only the freshly updated content.
What Is CloudFlare CDN?
So, now that you know about CDNs, let’s dive a bit deeper in the CDN world. CloudFare CDN is one of the most popular CDNs in the market, and it is free. Additionally, it also offers some extra features, which you can use to Optimize website performance, without worrying about the technical difficulties.
How CDN Helps To Speed Up Website?
Now, moving on to the technical details of how CDN helps for your website. If you have been having trouble finding ways to minify your website or defer the javascript, then you will need to hire us to help you with your website speed optimization. As always you can give a try on free CDN like CloudFlare, which supports basic website loading speed issues like caching pages, minifying the javascript and HTML script and makes it easier for you to deliver content to your visitors.
Additionally, when you have a proper content delivery network, your content gets served from the servers near your visitors, rather than your own servers, which also speeds up the delivery. The cached content is updated at regular intervals, so you don’t need to worry about issues. One more advantage of the CDN, or especially CloudFlare CDN is that the basic version is free enough, meaning you don’t have to pay anything to get your content cached and delivered correctly.
Set Up And Configure CloudFlare CDN:
Let’s get started on the basics of setting up CloudFlare CDN. Just follow the steps given below and you should be fine!
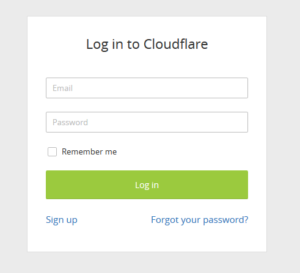
- Go to CloudFlare website, and sign up for an account with your email.
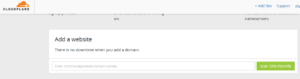
- On creating the account, you would need to enter your domain name. Go ahead, enter your website’s name, and click on ‘Scan DNS Records’ to obtain a scan for your website. Click on ‘Continue’ after that.
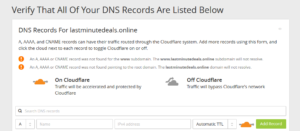
- Once CloudFlare has scanned all the DNS records, it will ask you to verify them. Make sure that there’s an orange CloudFlare icon beside your main/original domain name. This is the domain, which will be accelerated by CloudFlare.
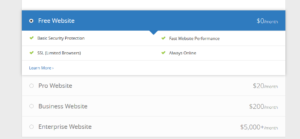
- The next step would be choosing your plan. You can opt for the ‘Free’ plan to try out things first. You can also choose from other options like ‘Pro Website’ at a cost of $20/month, or the ‘Business Website’ at a price of $200/month.
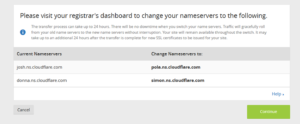
- In the next step, you would need to update your nameservers to the custom nameservers of the CloudFlare. This should be done at your registrar. If you are uncertain as to where and how you should update the nameservers, contact your registrar. Nameserver changes can take up to 24 hours to reflect, so be patient while you are at it.
- Then scroll through the settings of CloudFlare, and turn on the minifying options for ‘Minify JS’, ‘Minify CSS’ and ‘Minify HTML’. Just check mark them, and you’re done.
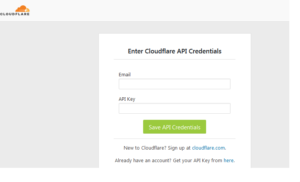
- Once the nameservers are updated, you can activate CloudFlare plugin in the WordPress site so that you can easily purge the cache from wp-admin. Once done, go to ‘Extensions’, then ‘Settings’ and click on ‘Credentials‘and then ‘Authorize’. All you need is the email address you have signed up for CloudFlare with, and your API key.
CloudFlare WordPress Plugin
To make the process of activating CloudFlare on your site easier, you can also try out the CloudFlare WordPress plugin. This helps you to verify your IP address of your website before you customize it for the CloudFlare Content Delivery Network. However, this is only applicable if you set up your CloudFlare manually. You would also need to register with CloudFlare on their website, with an email, and extract an API key for that.
So, now that you know about the ways to setup CloudFlare, the process of Speed optimization of WordPress site would be easier. Go ahead and do it, and if you encounter any errors, feel free to drop a comment!
Comments are closed here.